So... after surviving my first 5 weeks at planet cake, the time has come to officially introduce myself. Hi! My name is Michelle (Shell) Arvaj and I joined Neen on the intern rollercoster after leaving Melbourne back in April. When I was 14 I did my first cake decorating class and dabbled in cakes for a few years after that, however, my love for cake decorating was only realised when I did planet cake's novelty basics 101 course back in 2009. Since then, I've been hooked!
I was part of the awesome team that worked on the GIANT Sydney opera house cake earlier in the year and now I'm back to work and learn with the most amazing and talented cake decorators.
Week 1
When Paris asked me, "how are you with square cakes?" my response must of been somewhat convincing as she threw the task of completing 2 square cakes and ganashing 3 more (extended to 5 inches) at me! This, along with my very first DEI cake of Dora (that was to be acompanied by 24 cup cakes) made for a very busy start to my time at planet cake.
To be honest, my track record of square cakes had not been that successful to date, but I wasnt about to tell Paris that! The cakes themselves were pretty straight forward, but I had NEVER worked on that many at the same time before, especially when positioned in a room with the fastest cake decorator in the world Anna Maria sitting to my left and the most amazing cake sculptor Margie to my right.
Sure... No pressure...
Shell's weekly tip- STAY CALM
When your put in a situation that's a bit stressful it's sometimes hard to do great work (i.e. Super sharp square edges). You know the feeling... you've already spent 45mins trying to get it right but for every stroke of the pallet knife you take you seem to be getter further away from achiving that "edge", not closer. My advice - walk away! Not entirely, but just long enough for you to regain your conposure and return back to your cake with fresh eyes. And always use the fridge to help set the ganach quicker, working with ganach that's too soft is a nightmare! Why put yourself through it?
Week 2
At roughly 9 am Monday mornings the weekly cake orders are divied up between the team. I was a bit unsure what to expect, but was given a couple of simple wedding cakes and the ever popular newspaper cake to complete, which meant there were 2 big things I would learn this week;
1) Setting up a centre pole 2) Setting up a personalised DEI (Digitally Enhanced Image). With the help of a ruler, jigsaw, hot glue gun and Photoshop (not all for the same cake or used at the same
time!) task completed.
Shell's weekly tip: MEASURE TWICE, CUT ONCE!
For a centre pole, make sure you measure the bottom tiers of cake and halfway up your top tear. For most cakes a 13mm dowel should do the trick, and it also helps if you cut your dowel to a point at one end.
Make sure you don't forget to cut corresponding centre holes in the centre of you cake boards, and a dab if hot glue in you base board to secure your centre pole should put you in a good position to setting up a super straight cake!
For DEI's, always print out a test run on normal paper before printing onto the rice paper, this heps save some $$ and also gives you an opportunity to create a cutting template for the real deal.
Oh, and one more thing- for my rough finish royal icing wedding cake, I learnt to add glycerine to the icing mix to stop the royal from setting too hard. This helps when the lucky couple are cutting into the cake so heaps of dried icing doesnt crack everywhere. Too easy!
Week 3
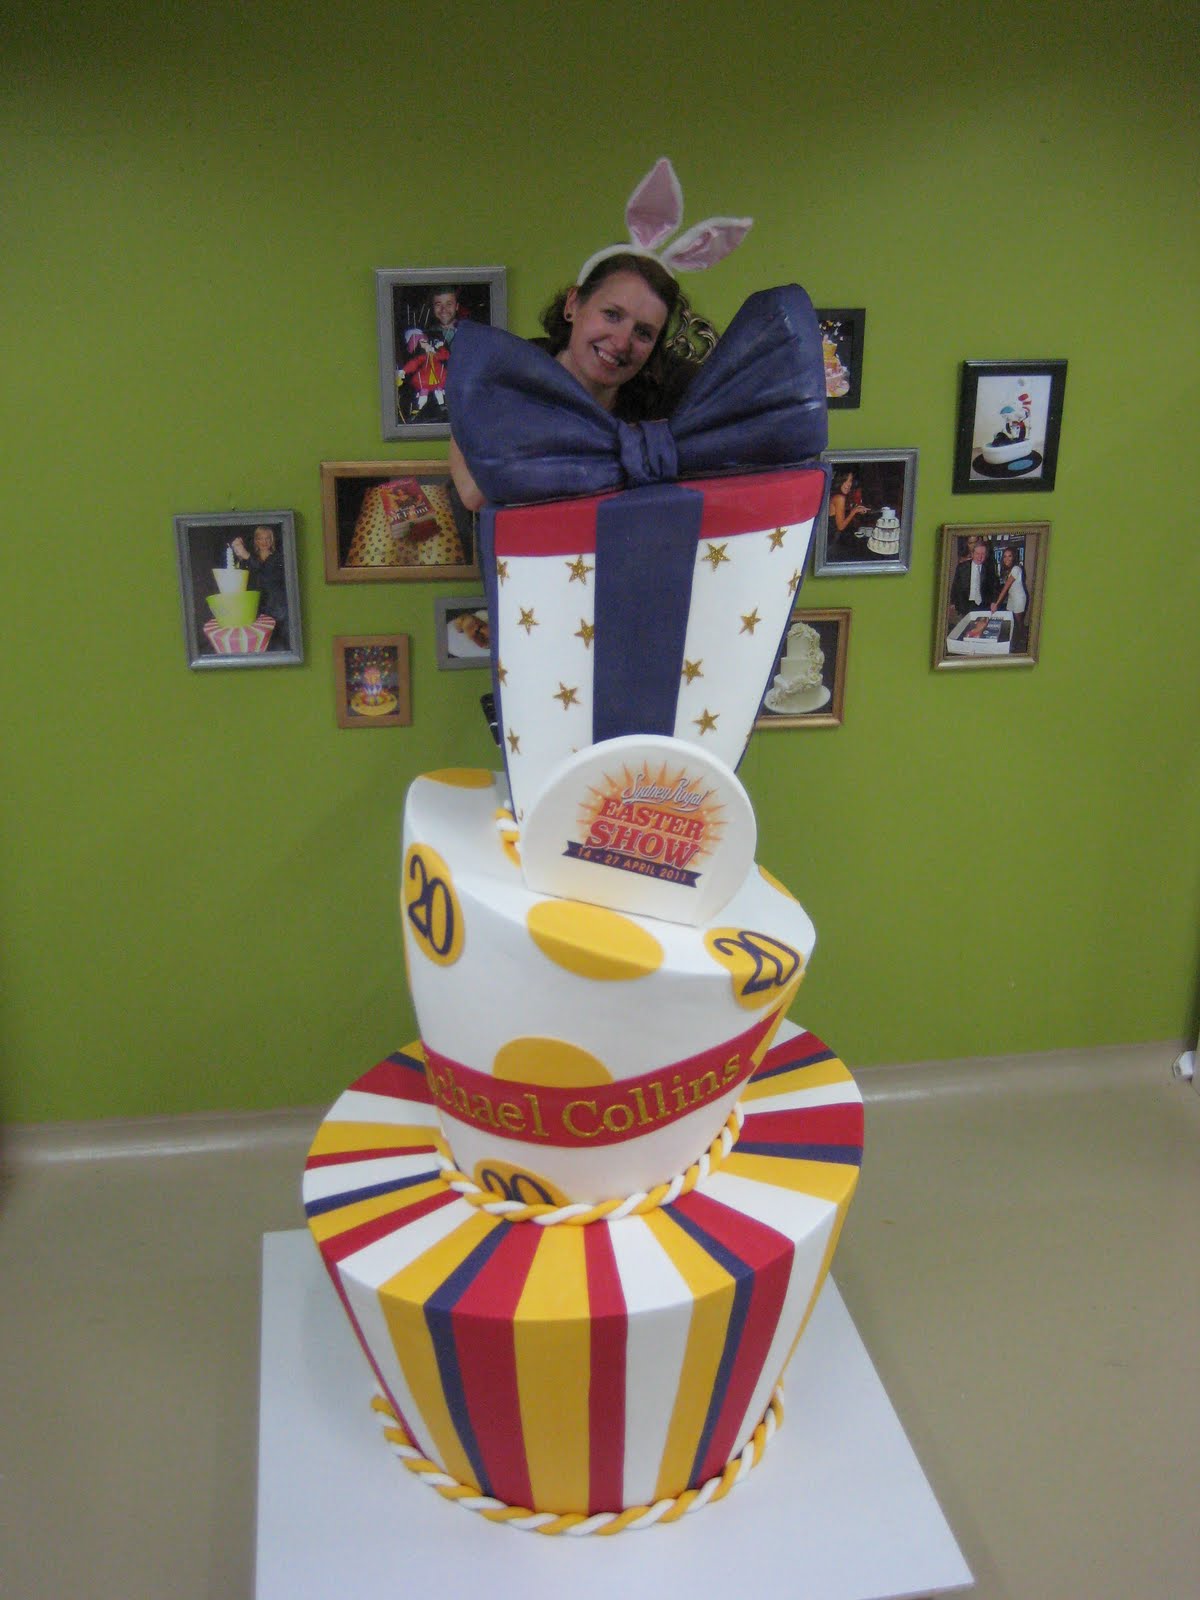
Although I had started the week working on a Easter bunny cake display for the front window, the week was highjacked by an amazing 2 meter mad-hatter cake for the royal Easter show. I had the pleasure of working with Anna Maria and Neen of the hu-mongous creation, and although I'm sure there is alot that can be said about this cake I think the photos speak for themselves.
Shell's weekly tip: POLYSTYRINE IS YOUR FRIEND!
When making huge cakes it just doesn't make sense to always use just cake, as, not only is it probably a waste to use enough cake to feed 500 people when you only need to feed 100, but cake is heavy, and a lot of cake is REALLY heavy! So here are 3 top tips when working with polystyrene;
1) Polystyrene melts when you use hot glue, so to stick pieces together, sandwich the hot glue between masking tape that has been suck to the pieces your sticking together.
2) In most cases there will be no need to ganache your polystyrine before covering, just brush sparingly with piping gel in prep for fondant
3) Cutting polystyrene is a messy job, make sure you use protective gear such as a face mask and overalls to keep you and your clothes safe.
Week 4
After making a giant cake in 2.5 days where do you go from there? Well apparently, back to a newspaper cake! With only 2 days in the production kitchen for me this week I also tackled a record player.
The key to this type of cake is preparing key elements early to allow to dry before assembly. In this case, for the "stick" I used flexible plastic tubing filled with flower wire (to make it bendy) and then covered with fondant mixed with a bit of tylose to make it dry quicker. After a day it's set hard enough for placement on the cake a painting. Oh, and to get that nice silver colour, mix your silver powder with decorating alcohol and paint away!
Shell's weekly tip: USE THE RIGHT COLOUR
So how do you make grey icing do you ask? Well the fact is you probably didn't ask because it seems so straight forward right? Get black icing and add white right? WRONG! Because the black icing is made with purple as a base colour, when you add white to it you end up with a light shade of purple. What you need to do is add a touch of yellow, yes that's right- yellow! And you will be making grey in no time! (Thanks for you help with that one Ritzy!)
Week 5
I was lucky enough to attend basics 106 springtime couse over the weekend and all I can say is WOW- that was AWESOME! Linda and Lesley did such a great job with the class and i met some amazing talented decorators in thd ckass. I had a ball! I wanted my design to be bold in colours and I think I achieved that.
Back in the production kitchen I was given 6 cakes to work on... Yes that's right- 6! I though it was going to be really tough but I focused on creating an achievable timeline, planned out my week and got to work... After 3.5 days and almost 100kgs of ganache also prepped for next week I was done! I could hardly beleive it myself but it seems I have definaty found my groove this week, maybe it's the excitement of my heading back home to Melbourne next week!
Shell's weekly tip: BE ORGANISED!
During my first couple weeks I think I literally spent hours running around the kitchen trying to find this, get that, clean this, move that... what a waste! Instead, it's best to plan you day out. Start with all you cutting, torting and ganching. Depending on the number of cakes you have that could take you all day (it certainly took me that long). Then look at all the icing colours you need and get them made.
Next get onto all your cake elements. The bows, stars, flowers etc.
Next your ready to cover your cakes (again a potential full day
affair) and last but not leat completing the cakes and piping you messages.
Planning your key outcomes for the day and then working on the same tasks for each cake, instead on each cake separately could really help speed things up.
Hope you enjoyed reading my post, appologies that it was a bit long as I tried to cram in as much info as I could without making in a novel.
I promise ill be more timely next time and look forwad to giving you some more helpful decirating tips!
Happy caking!
Shell :)