I don’t even know where to begin with this blog as so much has happened in the time since my last blog was posted.
The end of May was possibly my most challenging since my internship began. This time, it had nothing to do with the cakes though. I was going through quite a huge burst of homesickness and was having to deal with a few personal problems happening at home. The problem was, of course, was that I am living in Sydney and my family are in Melbourne.
I was completely on edge and, quite honestly, had so much trouble focusing on my work.
Everything came to a head on the night that I was leaving Sydney to spend a full 10 days in Melbourne with my family for a mid internship break.
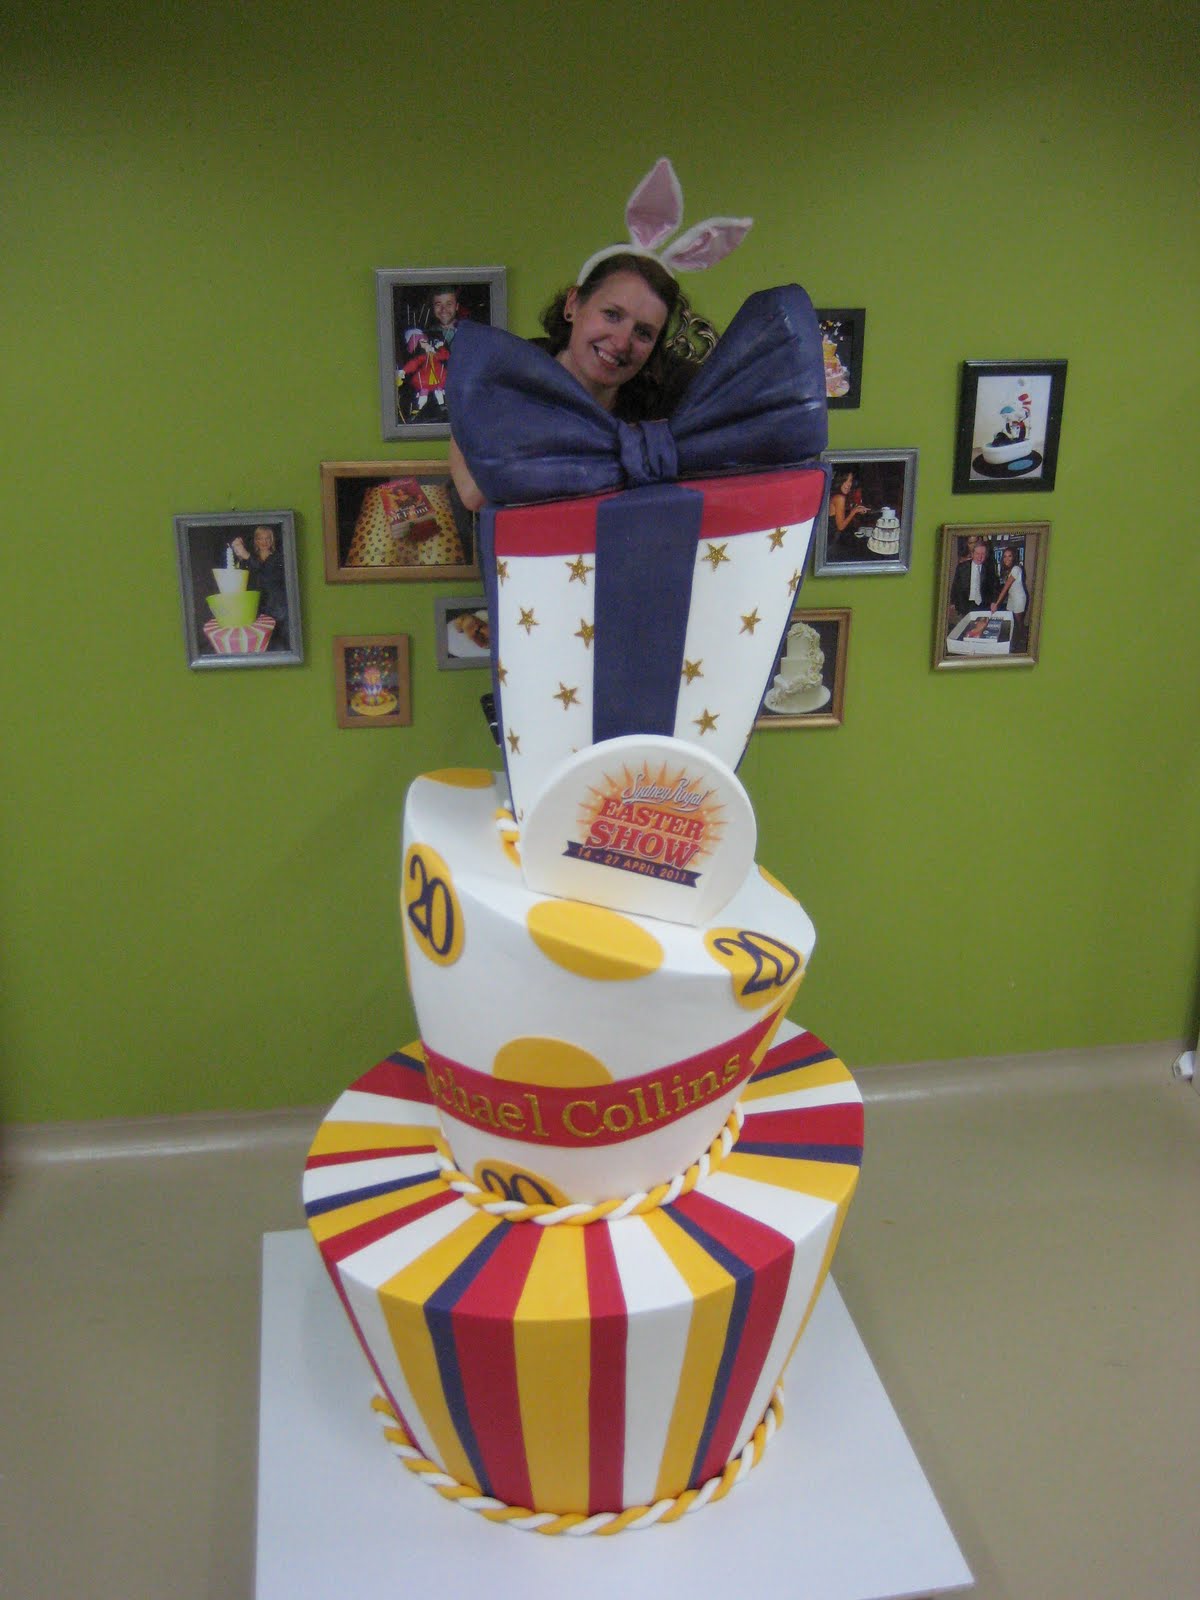
I had been assigned and amazing 3 tier wedding cake with an extended and quilted base tier, a technique that I had never attempted and completed successfully! Next was another extended tier covered in bling with a big black bow at the base. The top tier was another extended that was to be hand painted with a chandelier and adorned with a few small splashes of bling.
My 1st attempt on the top tier was a major fail. I covered the cake and the whole thing just looked warped and off. I stripped the cake to re ganache and realised that the cake itself was extremely soft and unstable. I added stability by placing another board between the two extended tiers of the cake and proceeded to re ganache the cake and leave it to set.
It was important to me to have this cake finished before I left work that evening to head to Melbourne so I had scheduled my time line accordingly and was on track to have it done.
I finally covered the top tier and prepared to hand paint the chandelier on. I was a little nervous about this as I would usually leave the cake overnight prior to painting but it had to be done after only a couple of hours drying.
With a steady hand and a great deal of patience, I finished the painting and was so proud of my efforts. The last things to do were to place the top tier on the cake and cover the board.
With about a half an hour until I was due to leave work, I placed the top tier onto the cake. With this, the entire cake cracked right down the center and there was no salvaging it. I literally burst into tears. There was absolutely nothing I could do about it and I HAD to get to the airport.
All I can say is thank God for Neoko and her calmness and generous spirit. She took my order, got a new cake out and ganached it with lightning speed as per usual. She told me to go home to my family, relax and just have a lovely time.
It was a bittersweet moment. I so desperately wanted to see the cake through from beginning to end as I had worked so hard on it however, I just felt so lucky to have the support of my team to make things right. I took the now sad and sorry looking top tier and hurled it into the rubbish bin which seemed to alleviate my tension somewhat!
The 10 days back at home with my family was exactly what I needed and not only gave me time with my amazing children and husband but also gave me the chance to start getting my business into order with a new name, logo and web site all sorted.
Just as I was almost ready to head back to Sydney and get back into work, some volcano had to go and erupt and leave a ginormous and potentially deadly ash cloud over Melbourne which ended up delaying my return to Planet Cake by 4 days. Just in time to begin Basics 107, the vase cake, with Anna Maria.
I am completely refreshed and calm after my break and feel ready to tackle the remaining 2 and a half months with gusto!
So, that is about where I am up to at this point. I have decided to delay writing the details about my 107 class as I am set to do 108 and 109 this week with my intern sister Michelle. Our next blog will be a joint one about our experience of being the student rather than the intern.
I cant wait to share it all with you.
Happy caking
Neen x
P.S. They haven't all been so disasterous! Some of the other cakes I have done recently...
Wednesday, June 22, 2011
Friday, June 17, 2011
Another update from Shell
I am about to embark on 3 weeks of SERIOUS CAKE CLASS MADNESS! Starting at Basics 107 and working through to Masters, but before I get there let me give you a run down of what I've been up to more recently.
Now - I need to be honest here... I'm a tried and true Melbourne girl, so when I was asked to make a rugby ball cake... well... I just didn't quite get the point. Why didn't the birthday boy want an AFL footy? And who exactly are the Crusaders? Regardless of all that, a Rugby ball seemed like such a straight forward design but I have to admit that it did take me quite some time to get it looking uniform. I also actually fretted a little with the prospect of covering the shape but due to the seam running down the centre of the ball it was easy enough to just pinch and cut away the excess icing at the join point. And although the point of the cake was lost on me I think it turned out pretty great.
So... it seems as though the classic "shooting stars" is exceptionally popular. In fact - I had two on the cards to make in a couple days! Kylie pretty much set up the girly one and I just gave her a hand to put on the finishing touches. The boy one was all me, and I think I could get it done with my eyes closed this time! They are such a great design and I would highly recommend those newbie cake decorators to give it a go... or of course you could sign up for the ever popular and AWESOME Planet Cake Basics 101 course and we could show you the tricks of the trade first hand... if you are SUPER keen and from the beautiful Melbourne you may even have an opportunity to get it taught to you by me one day! That is if you’re really lucky... (I'll keep you posted).
Back onto novelty cakes and I did a couple last week that made it to my favorites list. Firstly a cute lady bird cake and secondly a Penfolds red wine bottle. Although they were both 3D novelty cakes they were both set up slightly differently. Both cakes were torted and ganached as per normal. For the Lady bird I created a template out of cardboard for the cake to be built on. Once shaped I then covered it and then transferred it onto my covered base board. For the wine bottle, I actually set it up, shaped and covered it straight onto the base board. The reasons for this is the cake design, particularly the fragile neck of the bottle. If I had set it up and covered it on a template and tried to transfer it over to the base board, it would have been very difficult for me to do so without ruining the smooth finish.
Don't you think the bottle looks really life like? Well, to get that effect it was actually covered in a deep red icing colour and airbrushed with green and brown. Ritzy gave me a great demo of airbrushing and one of the key things to this shape is making sure you airbrush more heavily around the base of the cake and areas in the bottle where the "glass" is "bended" i.e. where the body of the bottle moves into the neck and the very bottom of the bottle. It is actually a little difficult to see in the picture, but in real life you can see the red icing showing through the air bushing a little. How very clever! Although I do wonder how many of you out there would be happier with a giant size bottle of wine in place of this chocolate mud cake one?
Last but not least, I had the pleasure of working on a cute pink christening cake. The design speaks for itself (and I have to admit it was awesome to work on a basic round for a change) but it did give me an opportunity to work on a figurine bear (my first at PC). I know it probably doesn't quite look like it is supposed to but it made me smile, so what more could you want? And before you start thinking of adding those cute cubes with the letters on them to your next cake design let me just give you a word of warning... they will literally suck the time out of your day and look super small for all your efforts. But by all means give it a go if you can spare the time and I'll admit it is a cute way to add in the special cake recipients initials.
So that's it for me in the production kitchen for a couple weeks. I'll keep you up to date with my progress through the courses...
Happy Caking,
Shell xx
Shell's weekly tip: GLOSS GLOSS GLOSS
When applying a glossy finish to your cakes I would recommend using a large, flat sided, soft bristle brush. At Planet Cake we use crystalline and apply the gloss in long even strokes. The most important thing to keep in mind is that you should avoid physically touching the glossed surface onceit is applied as you will end up with finger print marks - not a good look! So keep this in mind and try to make glossing your cake one of you very last steps. And one more thing - If you plan on airbrushing your cake try glossing first and then add the airbrushing colour on top. This will prevent any colour streaking and still get a great finish.
Now - I need to be honest here... I'm a tried and true Melbourne girl, so when I was asked to make a rugby ball cake... well... I just didn't quite get the point. Why didn't the birthday boy want an AFL footy? And who exactly are the Crusaders? Regardless of all that, a Rugby ball seemed like such a straight forward design but I have to admit that it did take me quite some time to get it looking uniform. I also actually fretted a little with the prospect of covering the shape but due to the seam running down the centre of the ball it was easy enough to just pinch and cut away the excess icing at the join point. And although the point of the cake was lost on me I think it turned out pretty great.
So... it seems as though the classic "shooting stars" is exceptionally popular. In fact - I had two on the cards to make in a couple days! Kylie pretty much set up the girly one and I just gave her a hand to put on the finishing touches. The boy one was all me, and I think I could get it done with my eyes closed this time! They are such a great design and I would highly recommend those newbie cake decorators to give it a go... or of course you could sign up for the ever popular and AWESOME Planet Cake Basics 101 course and we could show you the tricks of the trade first hand... if you are SUPER keen and from the beautiful Melbourne you may even have an opportunity to get it taught to you by me one day! That is if you’re really lucky... (I'll keep you posted).
Back onto novelty cakes and I did a couple last week that made it to my favorites list. Firstly a cute lady bird cake and secondly a Penfolds red wine bottle. Although they were both 3D novelty cakes they were both set up slightly differently. Both cakes were torted and ganached as per normal. For the Lady bird I created a template out of cardboard for the cake to be built on. Once shaped I then covered it and then transferred it onto my covered base board. For the wine bottle, I actually set it up, shaped and covered it straight onto the base board. The reasons for this is the cake design, particularly the fragile neck of the bottle. If I had set it up and covered it on a template and tried to transfer it over to the base board, it would have been very difficult for me to do so without ruining the smooth finish.
Don't you think the bottle looks really life like? Well, to get that effect it was actually covered in a deep red icing colour and airbrushed with green and brown. Ritzy gave me a great demo of airbrushing and one of the key things to this shape is making sure you airbrush more heavily around the base of the cake and areas in the bottle where the "glass" is "bended" i.e. where the body of the bottle moves into the neck and the very bottom of the bottle. It is actually a little difficult to see in the picture, but in real life you can see the red icing showing through the air bushing a little. How very clever! Although I do wonder how many of you out there would be happier with a giant size bottle of wine in place of this chocolate mud cake one?
Last but not least, I had the pleasure of working on a cute pink christening cake. The design speaks for itself (and I have to admit it was awesome to work on a basic round for a change) but it did give me an opportunity to work on a figurine bear (my first at PC). I know it probably doesn't quite look like it is supposed to but it made me smile, so what more could you want? And before you start thinking of adding those cute cubes with the letters on them to your next cake design let me just give you a word of warning... they will literally suck the time out of your day and look super small for all your efforts. But by all means give it a go if you can spare the time and I'll admit it is a cute way to add in the special cake recipients initials.
So that's it for me in the production kitchen for a couple weeks. I'll keep you up to date with my progress through the courses...
Happy Caking,
Shell xx
Shell's weekly tip: GLOSS GLOSS GLOSS
When applying a glossy finish to your cakes I would recommend using a large, flat sided, soft bristle brush. At Planet Cake we use crystalline and apply the gloss in long even strokes. The most important thing to keep in mind is that you should avoid physically touching the glossed surface onceit is applied as you will end up with finger print marks - not a good look! So keep this in mind and try to make glossing your cake one of you very last steps. And one more thing - If you plan on airbrushing your cake try glossing first and then add the airbrushing colour on top. This will prevent any colour streaking and still get a great finish.Friday, June 3, 2011
Update from Shell
Already another two weeks have passed and I'm left wondering how time flies so quickly.
On our last week of filming Neen and I were hit with the task of managing all the online orders so the other team members could be made abailable to work on some other crazy complex cakes. Lucky for us, we employed the help of Kylie to take on the role of the interns-intern. She was more than willing to help as we spent the first day of the week ganaching our hearts out.
Although I had a number of cakes to work on, My biggest challenge assigned was to create a 3D snoopy cake. Not having worked on many (or really any) 3D cartoon cakes, I knew this would test my skills. I started by meticulously measuring up my reference picture and shapping the cake. At the end of the day when I stood back and looked at the cake I knew something was wrong... The length- right, the height- right, the basic shape - right, but as a whole it was definetely not right. I went home in the hope that in the morning I would be in a better place to figure out what was going wrong.
I have to say, one thing I've noticed about making great cakes is that there comes a time in you planned schedule that you have to make a decision. Do you continue with the cake you currently have got that perhaps isn't perfect but you have already invested a few hours in and you know will still end up looking really good, or do you decide to abandon said plan and take the time to redo what has been done and blow out your time schedule and accept what you know will result in a few late evenings of decorating. For me my snoopy cake I opted for plan B and after taking the time to re-look at it with some fresh eyes and then requesting some advice from our resident Queen of all things 3D - Margie, I finally found out what was wrong was my cake. It was flat. So I ended up re-shaping it again to round out the edges of the cake. After that I was happy and could move onto the covering.
For covering this type of cake I knew I would end up with ALOT of extra icing. I could have slowly worked the folds down around the cake but I had a think about my design and thought about where I could create some folds in the icing for me to cut away and then ultimatly cover the join lines with other details. For me and snoopy, these areas were under snoopy's ears and arms. This method meant covering Snoopy was as less stressful as possible.
Throughout the whoile process of making this cake I refered back to my reference picture and measurements as often as possible to make sure all the elements on the cake were in proportion and correct. I think in the end I think he turned out great... even when looking through red tired eyes...
With the cameras and filming finally behind us, I was happy to start the week with a strange, but very much welcomed calmness in the air, and for the first time since starting at planet cakes almost 2 months ago I was only assigned two cakes to work on. Although the number was low, Paris was keen to test my attention to detail with designs that relied on very sharp and straight finishes to achieve great results.
The 3 tier wedding cake actually proved challenging due to both the difficulty in covering the extended height (particularly the top tier) and the placement of the ribbon. I must admit right here and now that I made the assumption that I could wrap the ribbon around the cake in no time at all. The reality, and trust me I'm not over exaggerating, but almost 2 hours after starting I employed the help of Neoko to help me finish the job because it was driving me coco banana's! Yep, that's right, over 2 hours! My advice- don't design a round cake with ribbon wrapping around it, leave it to the square cakes. Round cakes really don't lend themselves to having geometric lines wrapped around them, especially when you need to achieve straight lines so if doesn't end up looking like you were drunk while placing them.
My other cake assigned was the ever popular cube. Unlike the unforeseen challenges in the wedding cake I knew the square was a particularly time consuming design and in fact a design that I was most nervous about creating. To begin with I needed to prepare support for a double stacked 8" cake, and although I didn't realise it at first, I needed to set up a centre poll and also have a second cake board in the middle if the cake to ensure it would stay secure.
After ganaching and measuring every side to ensure a perfect square I have to say covering the undercoat was remarkable easy. I stated by covering the two side panels separately and then the last three panels with one long sheet of icing. By cutting off the excess at the joins you end up with quite a straight finish.
Next, I needed to create the pale blue coloured frame around the edge of the block. For this to look great I knew the lines needed to be perfectly straight. I know there are a numbers of was people do this but for me I worked on one section of the frame at a time starting with the top 4 lengths, then moving onto the four side lengths and finishing with the bottom found lengths.
This method is probably a little more time consuming, but it worked for me. I actually used this method to also cover the little blocks, which took up almost half a day to make. Like I said, this cake is deceivingly very time consuming, but my most proud accomplishment to date.
Shell's weekly tip: STOP, LOOK and LISTEN
If you know that things are just not going right and your groove is MIA, just STOP! Sometimes when you start getting frustrated you can start making things worse than they already are. Re-LOOK at what you are trying to achieve. Perhaps re measure your cake or refer to some new references. If you've re-looked at things and it still dosent seem to be quite there, then use your life line and phone a friend. If you don't have someone close by then jump on the planet cake tea party forum and get some advice and LISTEN to what other people have experienced in the past, their advice is priceless!
http://www.planetcaketeaparty.com.au/
By the way - To find out more about the other MEGA cakes that were made by the rest of the team in the last few weeks you will unfortunatly need to wait for the TV series to come out later in the year. Trust me, the wait is definitely worth it!
Happy caking,
Shell xx
Friday, May 13, 2011
Update from Neen
And so ends another crazy, mad capped, fun filled week at Planet Cake.
This week was filled with a whole new set of challenges, as usual, and I couldn’t be happier.
Due to some EXTREME cakes being made by the senior decorators in the kitchen, it was left to us very capable interns to take care of the more standard orders of the week.
I was assigned two wedding cakes, one 2 tier square with roses and one 3 tier round also with roses as well as a huge oblong christening cake for a set of twins .
The two tier square presented the challenge of having a specific type of rose requested to top the cake. I had never made a Delilah Rose before but was very happy with the final product.
Cake number 3 was a three tier round topped with sugar roses and featured gradient shades of the same colour through each tier to match the invitation colours. That was challenge enough let alone trying to shimmer the whole cake successfully without streaking it or making it look dusty. It took quite some time to get it to a point that I was happy with but, in the end, and after much experimenting, it ended up being a success.
So, as I sit here recovering from the past 5 frantic days, I nervously anticipate the week ahead as it is rumoured to be one of the biggest yet.
I do, however, feel more prepared than ever for whatever lies in wait for me around the corner of the sacred Planet Cake doors. Only time will tell if I am kidding myself or not! Wish me luck and, until next time, stay happy.
Neen x
This week was filled with a whole new set of challenges, as usual, and I couldn’t be happier.
Due to some EXTREME cakes being made by the senior decorators in the kitchen, it was left to us very capable interns to take care of the more standard orders of the week.
I was assigned two wedding cakes, one 2 tier square with roses and one 3 tier round also with roses as well as a huge oblong christening cake for a set of twins .
The two tier square presented the challenge of having a specific type of rose requested to top the cake. I had never made a Delilah Rose before but was very happy with the final product.
Amongst all of this, I managed to fit in a Biz Whiz class with Paris on Friday and learned so much more about getting my business off the ground when I finally return home for good at the end of August.
So, as I sit here recovering from the past 5 frantic days, I nervously anticipate the week ahead as it is rumoured to be one of the biggest yet.
I do, however, feel more prepared than ever for whatever lies in wait for me around the corner of the sacred Planet Cake doors. Only time will tell if I am kidding myself or not! Wish me luck and, until next time, stay happy.
Neen x
Shell here again
With a drink in hand and the surrounded by a few family and friends I'm happy to report that this blog update is coming to you from the warm and sunny Melbourne...and by warm and sunny I really mean cold and rainy, but lets not let the truth get in the way of a good story ;o)
Unfortunately (or fortunately, depending on how you look at it) I spent only 3 days in the production kitchen this week due to my mid week flight back home. I was lucky enough to get some fun cakes to work on this week including my very first tiffany box, a special cake designed for a women who loved gerbera's, the colour orange and red wine, another shooting stars cake with a figurine of wonder woman standing on top and a giant size chocolate bar.
Each cake had its own little challenge, but the most time consuming by far was creating the colourful gerberas that topped the bright orange square for Mandy's birthday cake. Those fiddly little petals almost got the better of me as the clock ticked closer to 7pm and into my 11th hour in the kitchen on Tuesday night, but what could I do? The flowers needed to be made and given time to dry before the cake assembly the next day! In the end I think the flowers turned out great and even though they were very hard to place onto the cake due to their very flat shape, I do think I achieved a good result.
My favorite cake this week was the giant size chocolate bar which was made with chocolate mud cake layered with chocolate ganache and topped with chocolate fondant...what more is there to say about that but YUM YUM YUM! The shape itself was quite straight forward to achieve. I started with a 7" square that was cut in half and sandwiched next to each other. Next was to ganache the whole cake and let it set. Once that was done I needed to measure up the cake and cut lines into the cake to form the chocolate blocks. Once cut, I let the cake set again before covering with fondant. And with thanks to Neoko for letting me borrow her really cool little wooden tool to help me smooth the fondant around the little chocolate blocks to make them look "chocolate shaped", the whole thing was coming together nicely.
Next I needed to paint the bottom inch of the cake in silver to make it look like foil. And then onto the DEI. Simple right? Well, not so simple really. For someone who doesn't know the first thing about Photoshop it took me a little while to set the DEI up to the right shape... but we did get there in the end thanks to some ego boosting from Emma - Thanks for that Em!
Once the DEI was ready I just needed to roll out some really thin fondant for the DEI to be stuck onto and then wrap around the cake. I tore off the top of the DEI to make it look like a torn wrapper. For the foil looking bits at the top of the cake I rolled out some really thin pieces of fondant through the pasta machine, ripped the edges, painted in silver and shoved them in!
I think the finished cakes looks pretty effective and will go down as one of my fave's.
Shell's Weekly tip - OPT FOR AIRBRUSHING
One of the reason I was having so much trouble with my gerberas was that the intensity and quantity of colour in my petal paste made it so soft that it was getting stuck to an in the petal cutters. I struggled through to make my flowers, but in hindsight I should have opted for less colour in my paste and then some airbrushing to achieve the colour intensity after. A lesson well learned for me so I though I should share!
I'm back in the kitchen on Tuesday and a bit unsure of what the week may bring... I heard down the grape one it's going to be HUGE!
Happy caking!
Shell.
Friday, May 6, 2011
Introducing Shell: our newest intern
So... after surviving my first 5 weeks at planet cake, the time has come to officially introduce myself. Hi! My name is Michelle (Shell) Arvaj and I joined Neen on the intern rollercoster after leaving Melbourne back in April. When I was 14 I did my first cake decorating class and dabbled in cakes for a few years after that, however, my love for cake decorating was only realised when I did planet cake's novelty basics 101 course back in 2009. Since then, I've been hooked!
I was part of the awesome team that worked on the GIANT Sydney opera house cake earlier in the year and now I'm back to work and learn with the most amazing and talented cake decorators.
Week 1
When Paris asked me, "how are you with square cakes?" my response must of been somewhat convincing as she threw the task of completing 2 square cakes and ganashing 3 more (extended to 5 inches) at me! This, along with my very first DEI cake of Dora (that was to be acompanied by 24 cup cakes) made for a very busy start to my time at planet cake.
To be honest, my track record of square cakes had not been that successful to date, but I wasnt about to tell Paris that! The cakes themselves were pretty straight forward, but I had NEVER worked on that many at the same time before, especially when positioned in a room with the fastest cake decorator in the world Anna Maria sitting to my left and the most amazing cake sculptor Margie to my right.
Sure... No pressure...
Shell's weekly tip- STAY CALM
When your put in a situation that's a bit stressful it's sometimes hard to do great work (i.e. Super sharp square edges). You know the feeling... you've already spent 45mins trying to get it right but for every stroke of the pallet knife you take you seem to be getter further away from achiving that "edge", not closer. My advice - walk away! Not entirely, but just long enough for you to regain your conposure and return back to your cake with fresh eyes. And always use the fridge to help set the ganach quicker, working with ganach that's too soft is a nightmare! Why put yourself through it?
Week 2
At roughly 9 am Monday mornings the weekly cake orders are divied up between the team. I was a bit unsure what to expect, but was given a couple of simple wedding cakes and the ever popular newspaper cake to complete, which meant there were 2 big things I would learn this week;
1) Setting up a centre pole 2) Setting up a personalised DEI (Digitally Enhanced Image). With the help of a ruler, jigsaw, hot glue gun and Photoshop (not all for the same cake or used at the same
time!) task completed.
Shell's weekly tip: MEASURE TWICE, CUT ONCE!
For a centre pole, make sure you measure the bottom tiers of cake and halfway up your top tear. For most cakes a 13mm dowel should do the trick, and it also helps if you cut your dowel to a point at one end.
Make sure you don't forget to cut corresponding centre holes in the centre of you cake boards, and a dab if hot glue in you base board to secure your centre pole should put you in a good position to setting up a super straight cake!
For DEI's, always print out a test run on normal paper before printing onto the rice paper, this heps save some $$ and also gives you an opportunity to create a cutting template for the real deal.
Oh, and one more thing- for my rough finish royal icing wedding cake, I learnt to add glycerine to the icing mix to stop the royal from setting too hard. This helps when the lucky couple are cutting into the cake so heaps of dried icing doesnt crack everywhere. Too easy!
Week 3
Although I had started the week working on a Easter bunny cake display for the front window, the week was highjacked by an amazing 2 meter mad-hatter cake for the royal Easter show. I had the pleasure of working with Anna Maria and Neen of the hu-mongous creation, and although I'm sure there is alot that can be said about this cake I think the photos speak for themselves.
Shell's weekly tip: POLYSTYRINE IS YOUR FRIEND!
When making huge cakes it just doesn't make sense to always use just cake, as, not only is it probably a waste to use enough cake to feed 500 people when you only need to feed 100, but cake is heavy, and a lot of cake is REALLY heavy! So here are 3 top tips when working with polystyrene;
1) Polystyrene melts when you use hot glue, so to stick pieces together, sandwich the hot glue between masking tape that has been suck to the pieces your sticking together.
2) In most cases there will be no need to ganache your polystyrine before covering, just brush sparingly with piping gel in prep for fondant
3) Cutting polystyrene is a messy job, make sure you use protective gear such as a face mask and overalls to keep you and your clothes safe.
Week 4
After making a giant cake in 2.5 days where do you go from there? Well apparently, back to a newspaper cake! With only 2 days in the production kitchen for me this week I also tackled a record player.
The key to this type of cake is preparing key elements early to allow to dry before assembly. In this case, for the "stick" I used flexible plastic tubing filled with flower wire (to make it bendy) and then covered with fondant mixed with a bit of tylose to make it dry quicker. After a day it's set hard enough for placement on the cake a painting. Oh, and to get that nice silver colour, mix your silver powder with decorating alcohol and paint away!
Shell's weekly tip: USE THE RIGHT COLOUR
So how do you make grey icing do you ask? Well the fact is you probably didn't ask because it seems so straight forward right? Get black icing and add white right? WRONG! Because the black icing is made with purple as a base colour, when you add white to it you end up with a light shade of purple. What you need to do is add a touch of yellow, yes that's right- yellow! And you will be making grey in no time! (Thanks for you help with that one Ritzy!)
Week 5
I was lucky enough to attend basics 106 springtime couse over the weekend and all I can say is WOW- that was AWESOME! Linda and Lesley did such a great job with the class and i met some amazing talented decorators in thd ckass. I had a ball! I wanted my design to be bold in colours and I think I achieved that.
Back in the production kitchen I was given 6 cakes to work on... Yes that's right- 6! I though it was going to be really tough but I focused on creating an achievable timeline, planned out my week and got to work... After 3.5 days and almost 100kgs of ganache also prepped for next week I was done! I could hardly beleive it myself but it seems I have definaty found my groove this week, maybe it's the excitement of my heading back home to Melbourne next week!
Shell's weekly tip: BE ORGANISED!
During my first couple weeks I think I literally spent hours running around the kitchen trying to find this, get that, clean this, move that... what a waste! Instead, it's best to plan you day out. Start with all you cutting, torting and ganching. Depending on the number of cakes you have that could take you all day (it certainly took me that long). Then look at all the icing colours you need and get them made.
Next get onto all your cake elements. The bows, stars, flowers etc.
Next your ready to cover your cakes (again a potential full day
affair) and last but not leat completing the cakes and piping you messages.
Planning your key outcomes for the day and then working on the same tasks for each cake, instead on each cake separately could really help speed things up.
Hope you enjoyed reading my post, appologies that it was a bit long as I tried to cram in as much info as I could without making in a novel.
I promise ill be more timely next time and look forwad to giving you some more helpful decirating tips!
Happy caking!
Shell :)
Friday, April 29, 2011
Half Way There!
Yes I know that I have been slack at updating this blog however, if you were in my shoes right now, you would completely understand why.
Just when I thought that things couldn’t get any more crazy around here, along comes Easter at Planet Cake.
So, there I was, executing a skill boosting task that was assigned to me by Paris, when mayhem slammed through the doors and dropped the ultimate bomb on us.
The request? A 2 meter high mad hatter cake to be presented at the Royal Easter Show…IN 2 DAYS TIME!!!!
Me? Panic? Hell yeah!!!!
Under Anna Marias guidance, Michelle, Anna Maria and I set to work carving ginormous blocks of Styrofoam into mad hatter tiers to make this monster. By the days end, I had mammoth blisters on my hands, every inch of my body was aching and you don’t even want to know where I found styro pellets!
The next morning, it was bright and early into work to try and complete this huge cake by the end of the day.
After adding cake, ganaching, colouring 34 kg of fondant, making the biggest bow you ever saw, covering the cake in angled stripes ( a skill that I had desperately wanted to learn but had never predicted it to be on such a scale!) , a top tier disaster, stacking and re stacking and adding every detail via a step ladder, team ‘MAMMOTH MAD HATTER’ ( AKA Anna Maria, Michelle and Myself), finally downed tools at around 10pm, stood back and marvelled at what we had achieved.
Honestly, a few hours prior to completion, I didn’t know if it was ever going to get done. All I can say is thank heavens for Paris’ stash of Red Bull that we swiped. 3 cans of that battery bevvy scooted me over the finish line and what a sense of elation and pride I had at the days end. Looking up at the worlds biggest mad hatter, I can truthfully say that every second was worth it.
I could have easily slept for a week afterwards but it wasn’t to be. Come Saturday morning, rain hail or shine ( and rain it did) the cake was to be presented to the recipient at the royal Easter Show which meant a super early start in order to be at the gates at 8.30am.
The crowds gathered in the pavilion and one very surprised Michael Collins accepted his cake as a token of his 20 years as the shows general manager. Needless to say, there was plenty of cake for everyone!
The rest of the day was spent enjoying all that the show has to offer including food on sticks, showbags, animals and rides that successfully and permanently shift every vital organ in your body at least half an inch. I am glad I chose to eat AFTER the rides if you get my drift.
Although the breather was a much needed one, it also meant heading back into the kitchen with only a 3 day week ahead and , just because it was only a 3 day week, it didn’t change the amount of cakes that needed to be completed.
I watched, in awe, as Anna Maria and Neoko built the most regal of wedding cakes in honour of the upcoming royal nuptuals and, once again, it was done both flawlessly and in record time.
All the while I focused on the three cakes that I had been assigned for the week. Due to a trip back home and a false start on Thursday morning, I only had a day and a half to get them all done.
It soon dawned on me that I had bitten off more than I could chew when I realised that there was a slight change of plans with one of the cakes due to some ‘technical difficulties’ and now needed to almost completely hand paint the decorations. It certainlytook me a lot longer than was originally anticipated.
I did however manage to complete two and a half of them before finally running out the door at 8.30pm last night in time to catch my flight back to Melbourne for the weekend.
So, here I am, resting in my own lounge room with my husband and should be concentrating on the break yet all I can seem to think about is what new and mammoth tasks await for me in the kitchen next week!
I am almost half way through my internship and yet I have so much yet to learn. Every day is something new, exciting and, well, exhausting but I wouldn’t trade this experience with anyone.
I look forward to getting home and putting everything that I have learned here at Planet Cake into practise. The closer it gets to the end, the more mixed feelings I have about what lies ahead.
I can’t wait to finally be back at home with my family, in my town yet I will miss all of my new family at Planet Cake terribly. I have fears about how I can possibly succeed without the guidanceand regular kick up the backside from Paris and the skillful hand of Anna Maria. There will be no Jess to protect me, no Lesley to hug and vent to and no Michelle to share the experience with. There will be no Emma to run the show so flawlessly and check up with me on how I am feeling and no Cat to bring me my late night Pizza and make me laugh. There will ,however, be a new woman in town, ready to take on all of the challenges presented to me and an entirely new set of skills and tools to tackle them with.
I can confidently say that I could not have even contemplated the future for myself that I do now without this opportunity.
I will forever be indebted to the amazing team at Planet Cake and I can’t wait to see what lies around the next corner!
Just when I thought that things couldn’t get any more crazy around here, along comes Easter at Planet Cake.
So, there I was, executing a skill boosting task that was assigned to me by Paris, when mayhem slammed through the doors and dropped the ultimate bomb on us.
The request? A 2 meter high mad hatter cake to be presented at the Royal Easter Show…IN 2 DAYS TIME!!!!
Me? Panic? Hell yeah!!!!
Under Anna Marias guidance, Michelle, Anna Maria and I set to work carving ginormous blocks of Styrofoam into mad hatter tiers to make this monster. By the days end, I had mammoth blisters on my hands, every inch of my body was aching and you don’t even want to know where I found styro pellets!
The next morning, it was bright and early into work to try and complete this huge cake by the end of the day.
After adding cake, ganaching, colouring 34 kg of fondant, making the biggest bow you ever saw, covering the cake in angled stripes ( a skill that I had desperately wanted to learn but had never predicted it to be on such a scale!) , a top tier disaster, stacking and re stacking and adding every detail via a step ladder, team ‘MAMMOTH MAD HATTER’ ( AKA Anna Maria, Michelle and Myself), finally downed tools at around 10pm, stood back and marvelled at what we had achieved.
Honestly, a few hours prior to completion, I didn’t know if it was ever going to get done. All I can say is thank heavens for Paris’ stash of Red Bull that we swiped. 3 cans of that battery bevvy scooted me over the finish line and what a sense of elation and pride I had at the days end. Looking up at the worlds biggest mad hatter, I can truthfully say that every second was worth it.
I could have easily slept for a week afterwards but it wasn’t to be. Come Saturday morning, rain hail or shine ( and rain it did) the cake was to be presented to the recipient at the royal Easter Show which meant a super early start in order to be at the gates at 8.30am.
The crowds gathered in the pavilion and one very surprised Michael Collins accepted his cake as a token of his 20 years as the shows general manager. Needless to say, there was plenty of cake for everyone!
The rest of the day was spent enjoying all that the show has to offer including food on sticks, showbags, animals and rides that successfully and permanently shift every vital organ in your body at least half an inch. I am glad I chose to eat AFTER the rides if you get my drift.
With fellow intern Michelle
The following few days were my 1st opportunity to actually experience Sydneys icons including the Harbour bridge, Luna Park, the Opera House and, most importantly, the Opera bar! LOL
I watched, in awe, as Anna Maria and Neoko built the most regal of wedding cakes in honour of the upcoming royal nuptuals and, once again, it was done both flawlessly and in record time.
All the while I focused on the three cakes that I had been assigned for the week. Due to a trip back home and a false start on Thursday morning, I only had a day and a half to get them all done.
It soon dawned on me that I had bitten off more than I could chew when I realised that there was a slight change of plans with one of the cakes due to some ‘technical difficulties’ and now needed to almost completely hand paint the decorations. It certainlytook me a lot longer than was originally anticipated.
I did however manage to complete two and a half of them before finally running out the door at 8.30pm last night in time to catch my flight back to Melbourne for the weekend.
So, here I am, resting in my own lounge room with my husband and should be concentrating on the break yet all I can seem to think about is what new and mammoth tasks await for me in the kitchen next week!
I am almost half way through my internship and yet I have so much yet to learn. Every day is something new, exciting and, well, exhausting but I wouldn’t trade this experience with anyone.
I look forward to getting home and putting everything that I have learned here at Planet Cake into practise. The closer it gets to the end, the more mixed feelings I have about what lies ahead.
I can’t wait to finally be back at home with my family, in my town yet I will miss all of my new family at Planet Cake terribly. I have fears about how I can possibly succeed without the guidanceand regular kick up the backside from Paris and the skillful hand of Anna Maria. There will be no Jess to protect me, no Lesley to hug and vent to and no Michelle to share the experience with. There will be no Emma to run the show so flawlessly and check up with me on how I am feeling and no Cat to bring me my late night Pizza and make me laugh. There will ,however, be a new woman in town, ready to take on all of the challenges presented to me and an entirely new set of skills and tools to tackle them with.
I can confidently say that I could not have even contemplated the future for myself that I do now without this opportunity.
I will forever be indebted to the amazing team at Planet Cake and I can’t wait to see what lies around the next corner!
Subscribe to:
Posts (Atom)


